Phandroid, the best Android news and reviews blog (i'm not just saying that because of the contest either), is celebrating Android Developers Appreciation Month (see why I love them now?). In the spirit of developer appreciation, they have decided to send one lucky developer to attend Google I/O 2012.
So how can you help send me to Google I/O? Just Like, Tweet or +1 this post with your friends!
After you have shared this, be sure to head over to Phandroid for all of your latest news, reviews and rumors. I recommend adding them to the top of your favorite news reader whether that be Google Currents, Pulse or Flipboard.
Thanks to all my followers and Phandroid.
Monday, June 4, 2012

Sunday, August 14, 2011
Johnathan's Card: Start to Finish
If you have been following internet news this month, you have no doubt heard of the Johnathan's Card social experiment, in which Johnathan Stark offered a screenshot of his Starbucks Card mobile payment barcode for others to use in a "Take a Coffee, Give a Coffee" manner. The experiment lasted nearly a month with anonymous donations of over $9000 via reloading Johnathan's Starbucks Card. Thousands of people across the U.S. used the card to buy themselves Starbucks or to buy coffee or lunch at Starbucks for other less fortunate individuals. It was heralded as a revolutionary "pay-it-forward" social experiment and while I never used or reloaded it myself, I watched it unfold from the beginning and was planning to add support for Johnathan's Card to My Coffee Card for Android this weekend. I hoped to keep the experiment running with weekly donations of proceeds from My Coffee Card Pro to Johnathan's Card. However, Starbucks shut it down on Friday and I am writing this instead.
So why was it shut down? The answer is both simple and complex. The short answer is: it was being scammed by individuals transferring hundreds of dollars to their own personal Starbucks Cards. Read on for the much longer and more interesting answer.
Background
When Johnathan's Card started, it was never created with the intention of the Take a Coffee, Give a Coffee revolution for which it has heralded. The card was loaded with a balance from Starks personal funds, in a social research experiment to see if users would do good by taking only what they need, or would they do bad and wipe the card out in a single transaction. It started well, and the card reached about half of its balance before someone emptied it and Johnathan reported that it was over.
Then, someone attempted to use the card and saw the balance was empty. In true Pay It Forward fashion, they loaded $10 of their own money on the card and tipped Johnathan off that the card could be reloaded anonymously via credit card or PayPal on the Starbucks website. Quickly the tune changed to the "Take a Coffee, Give a Coffee" or "Pay It Forward" experiment everyone is familiar with. It was heavily marketed and spread throughout the internet like a wildfire. A Twitter feed was set up to watch the progress and an API was available with up-to-the-minute information for more complex uses.
Starbucks involvement/Conspiracy Theory
Starks' company, Mobiquity, had a partners page on their website which listed Starbucks as one of their partners. When asked about Starbucks involvement in this or other projects, the page was quickly removed which started a conspiracy theory that Starbucks may have been involved in the whole thing from the start as a viral marketing campaign. This theory was denied by both Johnathan Stark and Starbucks. Stark says Starbucks had nothing to do with it. It was his own idea and experiment for his own project. Starbucks said that while the experiment is against their Starbucks Card terms of use, which disallows sharing of your registered Starbucks Card, they were excited to watch it from the sidelines.
The page listing Starbucks as a partner on the Mobiquity site was removed and Johnathan denounced naysayers in a steamed internet rant on Facebook and comments on various blogs. Starbucks involvement was again questioned when anonymous comments in support of the experiment showed up on blogs with the comments originating from a Starbucks owned IP address. Additionally, the partners page was removed from Googles cache, thus erasing history again, as was done at the turn of the experiment.
If Starbucks was not involved, their marketing department is probably wondering why they didn't think of it. Over the month long experiment/campaign, it significantly boosted mobile payments in-store, a huge focus for Starbucks right now; it introduced mobile payments to people that may have never used it otherwise, a huge focus of retailers, banks, smartphone manufactures and startups such as Mobiquity; and it brought hundreds of new or infrequent customers into the store. Involved or not, Starbucks was a huge beneficiary.
Personally, I could care less if Starbucks was involved or not. The experiment in its second incarnation, was used by thousands, sometimes for free Starbucks, sometimes for selfless acts and was loaded with over $9000 by anonymous donations. It was a successful social experiment, which many believed in (myself included), regardless of how it started. Note to Johnathan Stark and Mobiquity: Covering up facts and history is no way to make a point, just tell the truth.
The scandal
Johnathan's Card had a Twitter live stream which updated frequently, giving the balance throughout the day and alerting when the card was low or empty. There was also an API that provided up-to-the-minute balance information to third-party applications, such as the four Johnathan's Card apps for Android or a graph that shows the balance over the course of the experiment. Unfortunately, is was also used maliciously. A script was written and distributed which would watch the card balance via the API and play a song from your iTunes library when the balance is above a configured threshold. If you were on the Starbucks website, sitting at the ready, you could transfer those funds immediately to another card when the buzzer goes of, Instead of checking the available funds before getting in line, ordering and hoping there was still money on the card by the time you made it through the line, it became a battle of who could siphon the funds the fastest. Some were able to siphon hundreds of dollars worth.
Sam Odin, one of which was involved in siphoning funds, came forward saying he was able to transfer $625 onto two cards of his own. Enough to buy an iPad he claimed. Sam who is being called a modern day Robin Hood, didn't agree with the experiment, referring to it as "yuppies buying coffee for other yuppies". Sam stole money from the cards and listed the two cards on eBay, valued at $500 and $125. He will donate 100% of the winning auction price (minus selling fees) to the Save the Children foundation. The auction quickly reached over $3000 before being closed by eBay, apparently because you can not sell two cards together. He is now auctioning the $500 card and will auction the $125 card at a later date. The current bid on the $500 card is $625.
Was Johnathan's Card a scam?
What comes as a real shocker in this story is that Johnathan Stark comments HE KNEW THE CARD WAS BEING SCAMMED. He said that even though it was being scammed, he believed some people were still using it for good. In other words, loading money on the card which was being automatically transferred elsewhere and he was still benefiting from it. Very seldom were people actually able to use it to purchase a drink.
Johnathan benefited directly every time someone used the card. Each transaction earned him a star in the Starbucks My Rewards program where you earn a free drink coupon for each 15 transactions. Purchases and reloads both count. It was estimated that towards the end of the experiment, Johnathan was earning upwards of 100 free drink coupons per day. It was also huge PR for him and his company the longer the experiment lasted.
The End of Johnathan's Card
Even if the experiment was started with good intentions for social research and continued to operate on the premise of Pay It Forward, Johnathan should have stopped it as soon as it was known the scamming was occurring. Whether Johnathan transferred funds himself or not, him knowing of the scams and continuing to promote the project as people doing good for others makes him guilty of stealing himself in my book.
As soon as Starbucks found out about the card being siphoned, they notified Johnathan that the card would be deactivated, and it was on Friday night. It was a great experiment and people really believed in it. It gave people hope in humanity and brightened some peoples days. It is sad to see it come to and end, but Starbucks did the right thing. It was no longer being used for good, it was being used for the personal and/or financial gain of Johnathan Stark and countless other scammers.
A possible resolution?
The only "good" outcome I can see of this is if Starbucks were to deactivate every card which money was transferred to, for eBay to close the auctions for Tim Odin's cards and for Johnathon Stark to donate every free drink coupon received.
The whole scandal presents a new interesting question though. How was it that Tim and others were able to transfer funds from Johnathan's card, a registered Starbucks Card? Was this a security flaw in Johnathan's API which exposed the security code or account credentials, or is this a security hole in the Starbucks Card customer loyalty card system? Of course Johnathan's API is no longer accessible and all information has been erased from Google, but it is something I definitely intend to investigate further.
So why was it shut down? The answer is both simple and complex. The short answer is: it was being scammed by individuals transferring hundreds of dollars to their own personal Starbucks Cards. Read on for the much longer and more interesting answer.
Background
When Johnathan's Card started, it was never created with the intention of the Take a Coffee, Give a Coffee revolution for which it has heralded. The card was loaded with a balance from Starks personal funds, in a social research experiment to see if users would do good by taking only what they need, or would they do bad and wipe the card out in a single transaction. It started well, and the card reached about half of its balance before someone emptied it and Johnathan reported that it was over.
Then, someone attempted to use the card and saw the balance was empty. In true Pay It Forward fashion, they loaded $10 of their own money on the card and tipped Johnathan off that the card could be reloaded anonymously via credit card or PayPal on the Starbucks website. Quickly the tune changed to the "Take a Coffee, Give a Coffee" or "Pay It Forward" experiment everyone is familiar with. It was heavily marketed and spread throughout the internet like a wildfire. A Twitter feed was set up to watch the progress and an API was available with up-to-the-minute information for more complex uses.
Starbucks involvement/Conspiracy Theory
Starks' company, Mobiquity, had a partners page on their website which listed Starbucks as one of their partners. When asked about Starbucks involvement in this or other projects, the page was quickly removed which started a conspiracy theory that Starbucks may have been involved in the whole thing from the start as a viral marketing campaign. This theory was denied by both Johnathan Stark and Starbucks. Stark says Starbucks had nothing to do with it. It was his own idea and experiment for his own project. Starbucks said that while the experiment is against their Starbucks Card terms of use, which disallows sharing of your registered Starbucks Card, they were excited to watch it from the sidelines.
The page listing Starbucks as a partner on the Mobiquity site was removed and Johnathan denounced naysayers in a steamed internet rant on Facebook and comments on various blogs. Starbucks involvement was again questioned when anonymous comments in support of the experiment showed up on blogs with the comments originating from a Starbucks owned IP address. Additionally, the partners page was removed from Googles cache, thus erasing history again, as was done at the turn of the experiment.
If Starbucks was not involved, their marketing department is probably wondering why they didn't think of it. Over the month long experiment/campaign, it significantly boosted mobile payments in-store, a huge focus for Starbucks right now; it introduced mobile payments to people that may have never used it otherwise, a huge focus of retailers, banks, smartphone manufactures and startups such as Mobiquity; and it brought hundreds of new or infrequent customers into the store. Involved or not, Starbucks was a huge beneficiary.
Personally, I could care less if Starbucks was involved or not. The experiment in its second incarnation, was used by thousands, sometimes for free Starbucks, sometimes for selfless acts and was loaded with over $9000 by anonymous donations. It was a successful social experiment, which many believed in (myself included), regardless of how it started. Note to Johnathan Stark and Mobiquity: Covering up facts and history is no way to make a point, just tell the truth.
The scandal
Johnathan's Card had a Twitter live stream which updated frequently, giving the balance throughout the day and alerting when the card was low or empty. There was also an API that provided up-to-the-minute balance information to third-party applications, such as the four Johnathan's Card apps for Android or a graph that shows the balance over the course of the experiment. Unfortunately, is was also used maliciously. A script was written and distributed which would watch the card balance via the API and play a song from your iTunes library when the balance is above a configured threshold. If you were on the Starbucks website, sitting at the ready, you could transfer those funds immediately to another card when the buzzer goes of, Instead of checking the available funds before getting in line, ordering and hoping there was still money on the card by the time you made it through the line, it became a battle of who could siphon the funds the fastest. Some were able to siphon hundreds of dollars worth.
Sam Odin, one of which was involved in siphoning funds, came forward saying he was able to transfer $625 onto two cards of his own. Enough to buy an iPad he claimed. Sam who is being called a modern day Robin Hood, didn't agree with the experiment, referring to it as "yuppies buying coffee for other yuppies". Sam stole money from the cards and listed the two cards on eBay, valued at $500 and $125. He will donate 100% of the winning auction price (minus selling fees) to the Save the Children foundation. The auction quickly reached over $3000 before being closed by eBay, apparently because you can not sell two cards together. He is now auctioning the $500 card and will auction the $125 card at a later date. The current bid on the $500 card is $625.
Was Johnathan's Card a scam?
What comes as a real shocker in this story is that Johnathan Stark comments HE KNEW THE CARD WAS BEING SCAMMED. He said that even though it was being scammed, he believed some people were still using it for good. In other words, loading money on the card which was being automatically transferred elsewhere and he was still benefiting from it. Very seldom were people actually able to use it to purchase a drink.
Johnathan benefited directly every time someone used the card. Each transaction earned him a star in the Starbucks My Rewards program where you earn a free drink coupon for each 15 transactions. Purchases and reloads both count. It was estimated that towards the end of the experiment, Johnathan was earning upwards of 100 free drink coupons per day. It was also huge PR for him and his company the longer the experiment lasted.
The End of Johnathan's Card
Even if the experiment was started with good intentions for social research and continued to operate on the premise of Pay It Forward, Johnathan should have stopped it as soon as it was known the scamming was occurring. Whether Johnathan transferred funds himself or not, him knowing of the scams and continuing to promote the project as people doing good for others makes him guilty of stealing himself in my book.
As soon as Starbucks found out about the card being siphoned, they notified Johnathan that the card would be deactivated, and it was on Friday night. It was a great experiment and people really believed in it. It gave people hope in humanity and brightened some peoples days. It is sad to see it come to and end, but Starbucks did the right thing. It was no longer being used for good, it was being used for the personal and/or financial gain of Johnathan Stark and countless other scammers.
A possible resolution?
The only "good" outcome I can see of this is if Starbucks were to deactivate every card which money was transferred to, for eBay to close the auctions for Tim Odin's cards and for Johnathon Stark to donate every free drink coupon received.
The whole scandal presents a new interesting question though. How was it that Tim and others were able to transfer funds from Johnathan's card, a registered Starbucks Card? Was this a security flaw in Johnathan's API which exposed the security code or account credentials, or is this a security hole in the Starbucks Card customer loyalty card system? Of course Johnathan's API is no longer accessible and all information has been erased from Google, but it is something I definitely intend to investigate further.
Saturday, January 8, 2011
14 tips for Android beginners
Googles Android mobile operating system has surpassed Apples iOS in Q3 of 2010 to become the second most popular smartphone operating system behind Research In Motions Blackberry, and it was the top selling mobile OS in the 2010 holiday shopping season. Even before holiday shopping an average of 300,000 new Android phones and tablets were being activated each day and there is no sign of it slowing down as it was the star of the Consumer Electronics Show 2011(CES) this week where no fewer than two dozen new Android smartphones, tablets and media players were announced. Android is expected to surpass Blackberry in 2011 to take the #1 spot and Microsofts new Windows Phone 7 does not appear to be of any threat.
Did you get a new Android phone or tablet as a gift this holiday season or for your birthday? Did you purchase one yourself because you were intrigued by the exclusive combination of hardware such as big screens, hardware keyboards, 4G connectivity, high resolution cameras and HD video recording or software like Adobe Flash, high quality YouTube videos and free turn-by-turn GPS voice navigation that you can't get on other mobile phones? Or perhaps you were surprised to find you could get todays top smartphones on sale for only $0.01 or in a buy one get one free deal on your mobile carrier of choice and bought them for the whole family?
Whatever the case may be, if you are new to Android, these tips will help get you running up to speed quickly and easily with all of Androids power packed features, many of which are exclusive to Android that adopters from iPhone, Blackberry, Palm or Windows Mobile may not be aware of. You don't have to be a geek or have a masters in computer science to start using Android like a pro and customize it to your liking.
1) Installing apps and games
The number of applications and games in the Android Marketplace are estimated at over 200,000 and growing by thousands each day. Most "apps" and games are free or low cost, and can give your new phone or tablet added functionality, personalize it to your liking or just kill some time with a fun game. If you don't know what to download, check out my Top 10 Apps for Android to get you started. If you are interested in purchasing an application, review the description, screen shots, comments and product website (if it has one) closely and see if there is a free "lite" or "demo" version available to test before making your purchase. If you do decide to purchase, and are not totally satisfied, you have 15 minutes to return your purchase for a full refund by uninstalling the application or game. This refund period may be short, but other popular app stores have no such refund period at all. Also, do not be afraid to use your credit card to purchase apps and games from the market. Google Checkout is not only used for the Android Market, it is the second largest integrated merchant solution, and is used by millions of people everyday to pay for products and services from from millions of merchants all over the world. Your credit card data is most definitely kept private and secure.
2) Rating downloaded apps and games
Please leave a rating and comment on the apps and games you download, especially for paid apps. This lets the developers and potential downloaders know what you like or don't like about their apps and games. It's important to only rate based on what the application claims to do in its market description. If the application does exactly what it says, but isn't quite what you expected, or is missing a feature you want, you can say so in your comments, but only base your rating on how well it performs the actual features advertised. If you do have a question or feature request, or you found a bug in the software, try to contact the developers via email or their website before you leave negative feedback. The solution could be very simple and already supported or maybe the developer is not aware of the problem yet. You can find links to their email and website (if they have one) at the bottom of the applications page in the Android Market.
3) Menu button and the Options Menu
In order to make the best use of the limited screen space on mobile phones, most Android applications use an "Options Menu", which is similar to the menu bar found on desktop PC and Mac applications. Many users new to Android often are not aware of the options menu, and as a result may be missing out on most of an applications features. This is especially true of people who have used Apples iPhone, iPod or iPad in the past, as iOS has no such menu and forces everything to be displayed on the screen at once, a horrible waste of space. To open the options menu, press the Menu button on your phone or tablet. This is the most vital button on Android and is used in many of the other tips below. You should get into the habit of pressing the Menu button the first time you use a new application to familiarize yourself with its options.
4) Long press and the Context Menu
Another vital action on Android is the "Long Press". To perform a long press, press and hold on an item on the screen until the screen vibrates below your finger. A long press is similar to right clicking on a desktop PC or Mac and will often either bring up a "Context Menu" or allow you to manipulate the item in some other fashion. The long press gesture is important to learn will also be used in many of the following tips.
A "Context Menu" is a menu that lets you perform specific actions on a selected item on the screen. A context menu may not be used everywhere, in every application, but when they are used, they usually contain time-saving shortcuts that can make using the application easier and faster. Just like with the options menu, the context menu is not known to most using Android for the first time, and especially if they are coming from iOS which doesn't support them, or from a Mac, which usually has only a one button mouse and limited right-click functionality support in applications.
5) Notifications menu
One of the most useful features on Android is the Notifications menu. It is a simple, convenient and elegant way for Android to notify you of events without disrupting what you are currently doing, unlike the dialogs on other mobile operating systems that demand immediate attention. Missed calls, text messages, downloads, application push notifications and other such events will go to this menu. To open the notifications menu, slide your finger downwards from the top of the screen. Tapping on a notification in the list will open the respective application and clear the item from the list. You can clear all notifications by tapping the Clear button. Depending on the phone, this menu may also have options to enable and disable power thirsty options such as WiFi, Bluetooth, GPS, 3G/4G, and the LCD backlight.
6) Using home screens, your Android desktop
Your Android desktop consists of multiple customizable "Home Screens". You can customize your home screens however you want with widgets, wallpapers, folders, and shortcuts to applications, bookmarks, contacts and more. To switch between different home screens, slide your finger left or right across the screen. To place something on your home screen, press the Menu button and then press Add. To remove an item, Long press on it and drag it to the trash can which appears. You can move items between your home screens by long pressing on the item to move, then dragging it to the edge of the screen and hold it for a second until the home screen changes. The Android Market has thousands of new wallpapers, widgets and applications in the Personalization, Live Wallpapers and Widgets categories you can download.
7) Using Home Screen Widgets
A great personalization and time-saving feature that you will only find on Android is "Home Screen Widgets". Widgets act as an extension to the applications installed. They allow you to customize your home screen with small applets designed to be informative and useful. Sometimes widgets are self-contained applications and do not add an icon to your app drawer. To install a widget to your home screen, press Home, then press Menu > Add > Widgets, and select a widget from the list available. Some widgets will be placed immediately on the active home screen and others will need to be configured first. If the widget needs to be configured you will get a settings screen after selecting the widget.
Most home screen widgets update infrequently and are easy on your battery, but if you add too many that update frequently or rely on data services, you may see reduced battery life.
8) Using Wallpapers and Live Wallpapers
Static wallpapers are so 2007, which makes you wonder why it took until 2010 for other smartphones to get them. In addition to Wallpapers, which has existed since the first release of Android, another great personalization feature you will only find on Android are "Live Wallpapers" which were added in Android 2.0 (Eclair). Live wallpapers are home screen backgrounds that are animated and interactive. They play behind your icons, widgets and menus and can respond to user input such as tapping or double tapping the screen, swiping your finger or adding and removing shortcuts and widgets. Live Wallpapers can be as simple as animated snow falling across your screen to full on games you can play directly on your home screen.
You can download new live wallpapers from the Android Market in the Live Wallpapers category. Most Live Wallpapers will not add an icon to your app drawer when installed. To set one as your wallpaper, press Home, then Press Menu > Wallpaper > Live Wallpapers and select one from the list. Many live wallpapers are configurable, so look for a Settings button at the bottom of the screen. When you are done configuring the wallpaper settings press back to return to the preview, then press the Set wallpaper button to activate it. You can make changes to the settings any time by returning to this screen, some phones may also have a Configure wallpaper option when you long press on the home screen.
Live Wallpapers will only animate while the screen is on and the home screen is visible, so most will have little effect on your battery, but a really active live wallpaper can cause delays when switching home screens and reduce battery life.
9) Using Folders and Live folders
To help keep your home screens simple and organized, you can place folders on your home screen like you would with other shortcuts. Folders can contain anything that you can place on the home screen, except widgets and other folders. There is no limit to the number of items a folder can contain. To add a folder to your home screen press Home, then press Menu > Add > Folders > New Folder.
Items cannot be added directly to a folder (a slight oversight?), you must first place it on your home screen, then long press it and drag it to the folder. To remove an item, long press it and drag it to the trash can which appears. Folders can be renamed by first opening the folder and then long pressing on the title bar.
Just like Live Wallpapers, while other smartphones are just starting to figure out static folders, Android has had "Live Folders" since the first release. Live Folders are folders whose contents are automatically updated in real-time by application data such as contacts, bookmarks, email, news or music playlists. Some applications will add new Live Folders, such as Pandora, which adds a My Stations live folder. Clicking a station in this folder will open Pandora and tune in to the selected station from a single tap on your home screen.
10) Searching
Google is best known for its wonderful search engine, so it goes without saying that it wouldn't be a Google operating system if some of this awesome search technology didn't make it on to Android devices. Most Android handsets and tablets have a Search button on the front of the device or on its slide-out hardware keyboard. If you do not have a hardware search button, press the Menu button, and the press Search from the options menu. Search allows you to simultaneously search the Internet, Emails, Contacts, Market Applications, Music, and more. It can even search inside applications you have downloaded from the Android Market for applications that support it. To configure which applications are searched by the Search button, press Home, then press Menu > Settings > Search > Searchable items. Many applications also support using the search button to search within the application, press the search button while inside your favorite apps to see if it is supported.
11) Voice Actions
With Android, Google has taken mobile searching to a whole new level with "Voice Actions", another Android exclusive feature. You can use voice actions to perform many common tasks such as calling contacts, sending a text message, getting directions or searching online. To do a voice search, Long press the Search button, or press the microphone icon on your on-screen keyboard, then speak your query.
Try actions like "Call John Smith" to call a contact named John Smith; "Send text to John Smith, I will be there in 10 minutes" to send John a text message that you are on your way; "Play The Doors Greatest Hits" to listen to your favorite music album; or "Navigate to Starbucks" to get turn-by-turn GPS voice navigation to the nearest Starbucks using Google Maps, included free with your Android device.
For a list of other voice actions see http://www.google.com/mobile/voice-actions/. Voice actions are adaptive and will improve over time as it learns your voice and speech patterns.
12) Multi-tasking
Android was built from the ground up with its best in class multi-tasking, it was not added as an afterthought years later and it is the only smartphone operating system to offer true multi-tasking. Instead of pausing and resuming applications or limiting applications to a very small subset of background functionality, applications can continue running in the background just as if they were visible on the screen.
It's so simple. Every time you use your Android device, you are using its advance multi-tasking system without even realizing it. There are no confusing button combinations to learn, no pop-up dialogs, and no jiggling close buttons. Simply press the Home button to get back to your home screen and start another application. The next time you return to your old application, it will have finished its work and you will be brought back to the application in the exact state you left it.
Android will automatically manage your applications in the background and close them down when they are finished and no longer needed, or will pause them when more memory is needed for the operating system or other foreground applications.
13) Conserving battery
With lots of memory; a fast processor; a big, bright LCD screen; 4G; WiFi; Bluetooth; turn-by-turn GPS navigation; high resolution cameras and HD video recording; streaming internet music and videos; downloadable apps multi-tasking in the background; multiple customized home screens with widgets, live wallpapers, live folders; push notifications and more all going on at the same time its a wonder an Android device can even last 5 minutes on a full charge, nonetheless a few days.
The the more the screen is on and you are actively using the device, the quicker the battery will drain. The good thing is, Android takes care of most battery management for you. It will turn the screen, CPU, storage and WiFi off when not in use, it only uses battery for GPS and Bluetooth when those services are being used. 3G/4G data is only used when not connected to WiFi, etc. Most users are able to get a full day of use out of their device with moderate usage without changing any settings, but there are a few you can change to maximize time between charges. For a comprehensive guide, see my Battery Tips.
14) Task killers
With multi-tasking and batteries, there is always the discussion of "Task Killer" applications. These are even installed by some shops when activating the phone or when taking it in for service. A task killer will run as a service in the background, automatically killing applications with the claim that it will improve battery life. The constant polling done by a task killer uses up a lot of battery than it saves and it prevents the phone from sleeping where it will conserve the most battery. In short, a task killer duplicates the functionality that Android already does better and will drain your battery faster in the process.
The real problem with task killers comes from their tendency to prematurely kill applications. If your Android device is having frequent lockups, application timeouts and crashes or reboots randomly, at least 9 out of 10 times this is caused by running a task killer as a background service instead of a problem with your hardware or software. So don't do it, even if the service representative at your wireless shop recommend it, nothing good will come of it.
The End... for now
I hope that this has helped you learn more about your new Android phone, tablet or media player. These 14 tips are the bare essentials every Android user needs to know and only scratch the surface of the power and customization that Android offers you as a user. Look for a follow up soon that will go further into customizing and extending your Android devices with 3rd-party apps.
If you have any other useful tips, please share them with others in the comments below.
Did you get a new Android phone or tablet as a gift this holiday season or for your birthday? Did you purchase one yourself because you were intrigued by the exclusive combination of hardware such as big screens, hardware keyboards, 4G connectivity, high resolution cameras and HD video recording or software like Adobe Flash, high quality YouTube videos and free turn-by-turn GPS voice navigation that you can't get on other mobile phones? Or perhaps you were surprised to find you could get todays top smartphones on sale for only $0.01 or in a buy one get one free deal on your mobile carrier of choice and bought them for the whole family?
Whatever the case may be, if you are new to Android, these tips will help get you running up to speed quickly and easily with all of Androids power packed features, many of which are exclusive to Android that adopters from iPhone, Blackberry, Palm or Windows Mobile may not be aware of. You don't have to be a geek or have a masters in computer science to start using Android like a pro and customize it to your liking.
1) Installing apps and games
The number of applications and games in the Android Marketplace are estimated at over 200,000 and growing by thousands each day. Most "apps" and games are free or low cost, and can give your new phone or tablet added functionality, personalize it to your liking or just kill some time with a fun game. If you don't know what to download, check out my Top 10 Apps for Android to get you started. If you are interested in purchasing an application, review the description, screen shots, comments and product website (if it has one) closely and see if there is a free "lite" or "demo" version available to test before making your purchase. If you do decide to purchase, and are not totally satisfied, you have 15 minutes to return your purchase for a full refund by uninstalling the application or game. This refund period may be short, but other popular app stores have no such refund period at all. Also, do not be afraid to use your credit card to purchase apps and games from the market. Google Checkout is not only used for the Android Market, it is the second largest integrated merchant solution, and is used by millions of people everyday to pay for products and services from from millions of merchants all over the world. Your credit card data is most definitely kept private and secure.
2) Rating downloaded apps and games
Please leave a rating and comment on the apps and games you download, especially for paid apps. This lets the developers and potential downloaders know what you like or don't like about their apps and games. It's important to only rate based on what the application claims to do in its market description. If the application does exactly what it says, but isn't quite what you expected, or is missing a feature you want, you can say so in your comments, but only base your rating on how well it performs the actual features advertised. If you do have a question or feature request, or you found a bug in the software, try to contact the developers via email or their website before you leave negative feedback. The solution could be very simple and already supported or maybe the developer is not aware of the problem yet. You can find links to their email and website (if they have one) at the bottom of the applications page in the Android Market.
3) Menu button and the Options Menu
In order to make the best use of the limited screen space on mobile phones, most Android applications use an "Options Menu", which is similar to the menu bar found on desktop PC and Mac applications. Many users new to Android often are not aware of the options menu, and as a result may be missing out on most of an applications features. This is especially true of people who have used Apples iPhone, iPod or iPad in the past, as iOS has no such menu and forces everything to be displayed on the screen at once, a horrible waste of space. To open the options menu, press the Menu button on your phone or tablet. This is the most vital button on Android and is used in many of the other tips below. You should get into the habit of pressing the Menu button the first time you use a new application to familiarize yourself with its options.
4) Long press and the Context Menu
Another vital action on Android is the "Long Press". To perform a long press, press and hold on an item on the screen until the screen vibrates below your finger. A long press is similar to right clicking on a desktop PC or Mac and will often either bring up a "Context Menu" or allow you to manipulate the item in some other fashion. The long press gesture is important to learn will also be used in many of the following tips.
A "Context Menu" is a menu that lets you perform specific actions on a selected item on the screen. A context menu may not be used everywhere, in every application, but when they are used, they usually contain time-saving shortcuts that can make using the application easier and faster. Just like with the options menu, the context menu is not known to most using Android for the first time, and especially if they are coming from iOS which doesn't support them, or from a Mac, which usually has only a one button mouse and limited right-click functionality support in applications.
5) Notifications menu
One of the most useful features on Android is the Notifications menu. It is a simple, convenient and elegant way for Android to notify you of events without disrupting what you are currently doing, unlike the dialogs on other mobile operating systems that demand immediate attention. Missed calls, text messages, downloads, application push notifications and other such events will go to this menu. To open the notifications menu, slide your finger downwards from the top of the screen. Tapping on a notification in the list will open the respective application and clear the item from the list. You can clear all notifications by tapping the Clear button. Depending on the phone, this menu may also have options to enable and disable power thirsty options such as WiFi, Bluetooth, GPS, 3G/4G, and the LCD backlight.
6) Using home screens, your Android desktop
Your Android desktop consists of multiple customizable "Home Screens". You can customize your home screens however you want with widgets, wallpapers, folders, and shortcuts to applications, bookmarks, contacts and more. To switch between different home screens, slide your finger left or right across the screen. To place something on your home screen, press the Menu button and then press Add. To remove an item, Long press on it and drag it to the trash can which appears. You can move items between your home screens by long pressing on the item to move, then dragging it to the edge of the screen and hold it for a second until the home screen changes. The Android Market has thousands of new wallpapers, widgets and applications in the Personalization, Live Wallpapers and Widgets categories you can download.
7) Using Home Screen Widgets
A great personalization and time-saving feature that you will only find on Android is "Home Screen Widgets". Widgets act as an extension to the applications installed. They allow you to customize your home screen with small applets designed to be informative and useful. Sometimes widgets are self-contained applications and do not add an icon to your app drawer. To install a widget to your home screen, press Home, then press Menu > Add > Widgets, and select a widget from the list available. Some widgets will be placed immediately on the active home screen and others will need to be configured first. If the widget needs to be configured you will get a settings screen after selecting the widget.
Most home screen widgets update infrequently and are easy on your battery, but if you add too many that update frequently or rely on data services, you may see reduced battery life.
8) Using Wallpapers and Live Wallpapers
Static wallpapers are so 2007, which makes you wonder why it took until 2010 for other smartphones to get them. In addition to Wallpapers, which has existed since the first release of Android, another great personalization feature you will only find on Android are "Live Wallpapers" which were added in Android 2.0 (Eclair). Live wallpapers are home screen backgrounds that are animated and interactive. They play behind your icons, widgets and menus and can respond to user input such as tapping or double tapping the screen, swiping your finger or adding and removing shortcuts and widgets. Live Wallpapers can be as simple as animated snow falling across your screen to full on games you can play directly on your home screen.
You can download new live wallpapers from the Android Market in the Live Wallpapers category. Most Live Wallpapers will not add an icon to your app drawer when installed. To set one as your wallpaper, press Home, then Press Menu > Wallpaper > Live Wallpapers and select one from the list. Many live wallpapers are configurable, so look for a Settings button at the bottom of the screen. When you are done configuring the wallpaper settings press back to return to the preview, then press the Set wallpaper button to activate it. You can make changes to the settings any time by returning to this screen, some phones may also have a Configure wallpaper option when you long press on the home screen.
Live Wallpapers will only animate while the screen is on and the home screen is visible, so most will have little effect on your battery, but a really active live wallpaper can cause delays when switching home screens and reduce battery life.
9) Using Folders and Live folders
To help keep your home screens simple and organized, you can place folders on your home screen like you would with other shortcuts. Folders can contain anything that you can place on the home screen, except widgets and other folders. There is no limit to the number of items a folder can contain. To add a folder to your home screen press Home, then press Menu > Add > Folders > New Folder.
Items cannot be added directly to a folder (a slight oversight?), you must first place it on your home screen, then long press it and drag it to the folder. To remove an item, long press it and drag it to the trash can which appears. Folders can be renamed by first opening the folder and then long pressing on the title bar.
Just like Live Wallpapers, while other smartphones are just starting to figure out static folders, Android has had "Live Folders" since the first release. Live Folders are folders whose contents are automatically updated in real-time by application data such as contacts, bookmarks, email, news or music playlists. Some applications will add new Live Folders, such as Pandora, which adds a My Stations live folder. Clicking a station in this folder will open Pandora and tune in to the selected station from a single tap on your home screen.
10) Searching
Google is best known for its wonderful search engine, so it goes without saying that it wouldn't be a Google operating system if some of this awesome search technology didn't make it on to Android devices. Most Android handsets and tablets have a Search button on the front of the device or on its slide-out hardware keyboard. If you do not have a hardware search button, press the Menu button, and the press Search from the options menu. Search allows you to simultaneously search the Internet, Emails, Contacts, Market Applications, Music, and more. It can even search inside applications you have downloaded from the Android Market for applications that support it. To configure which applications are searched by the Search button, press Home, then press Menu > Settings > Search > Searchable items. Many applications also support using the search button to search within the application, press the search button while inside your favorite apps to see if it is supported.
11) Voice Actions
With Android, Google has taken mobile searching to a whole new level with "Voice Actions", another Android exclusive feature. You can use voice actions to perform many common tasks such as calling contacts, sending a text message, getting directions or searching online. To do a voice search, Long press the Search button, or press the microphone icon on your on-screen keyboard, then speak your query.
Try actions like "Call John Smith" to call a contact named John Smith; "Send text to John Smith, I will be there in 10 minutes" to send John a text message that you are on your way; "Play The Doors Greatest Hits" to listen to your favorite music album; or "Navigate to Starbucks" to get turn-by-turn GPS voice navigation to the nearest Starbucks using Google Maps, included free with your Android device.
For a list of other voice actions see http://www.google.com/mobile/voice-actions/. Voice actions are adaptive and will improve over time as it learns your voice and speech patterns.
12) Multi-tasking
Android was built from the ground up with its best in class multi-tasking, it was not added as an afterthought years later and it is the only smartphone operating system to offer true multi-tasking. Instead of pausing and resuming applications or limiting applications to a very small subset of background functionality, applications can continue running in the background just as if they were visible on the screen.
It's so simple. Every time you use your Android device, you are using its advance multi-tasking system without even realizing it. There are no confusing button combinations to learn, no pop-up dialogs, and no jiggling close buttons. Simply press the Home button to get back to your home screen and start another application. The next time you return to your old application, it will have finished its work and you will be brought back to the application in the exact state you left it.
Android will automatically manage your applications in the background and close them down when they are finished and no longer needed, or will pause them when more memory is needed for the operating system or other foreground applications.
13) Conserving battery
With lots of memory; a fast processor; a big, bright LCD screen; 4G; WiFi; Bluetooth; turn-by-turn GPS navigation; high resolution cameras and HD video recording; streaming internet music and videos; downloadable apps multi-tasking in the background; multiple customized home screens with widgets, live wallpapers, live folders; push notifications and more all going on at the same time its a wonder an Android device can even last 5 minutes on a full charge, nonetheless a few days.
The the more the screen is on and you are actively using the device, the quicker the battery will drain. The good thing is, Android takes care of most battery management for you. It will turn the screen, CPU, storage and WiFi off when not in use, it only uses battery for GPS and Bluetooth when those services are being used. 3G/4G data is only used when not connected to WiFi, etc. Most users are able to get a full day of use out of their device with moderate usage without changing any settings, but there are a few you can change to maximize time between charges. For a comprehensive guide, see my Battery Tips.
14) Task killers
With multi-tasking and batteries, there is always the discussion of "Task Killer" applications. These are even installed by some shops when activating the phone or when taking it in for service. A task killer will run as a service in the background, automatically killing applications with the claim that it will improve battery life. The constant polling done by a task killer uses up a lot of battery than it saves and it prevents the phone from sleeping where it will conserve the most battery. In short, a task killer duplicates the functionality that Android already does better and will drain your battery faster in the process.
The real problem with task killers comes from their tendency to prematurely kill applications. If your Android device is having frequent lockups, application timeouts and crashes or reboots randomly, at least 9 out of 10 times this is caused by running a task killer as a background service instead of a problem with your hardware or software. So don't do it, even if the service representative at your wireless shop recommend it, nothing good will come of it.
The End... for now
I hope that this has helped you learn more about your new Android phone, tablet or media player. These 14 tips are the bare essentials every Android user needs to know and only scratch the surface of the power and customization that Android offers you as a user. Look for a follow up soon that will go further into customizing and extending your Android devices with 3rd-party apps.
If you have any other useful tips, please share them with others in the comments below.
Tuesday, December 28, 2010
Cover Art Downloader hits 50k downloads
If you use your Android device to listen to music, Cover Art Downloader is an essential application that will automatically retrieve your missing album cover art. It works with the stock Android music player as well as many popular 3rd-party players and has many useful features.
In less than two months since release, Cover Art Downloader for Android has reached a new milestone of 50,000 downloads. It is currently positioned at #22 in the Music & Audio category on the Android Market (#14 on AppBrain) with other top apps such as Pandora, Shazam, PowerAMP, Winamp, Soundhound and doubleTwist and is the top rated app of its kind.
Thanks to all who have downloaded and rated/commented. If you have yet to try it out, download it free today and lets see it hit the next milestone of 250,000 downloads and top 10 in 2011.
In less than two months since release, Cover Art Downloader for Android has reached a new milestone of 50,000 downloads. It is currently positioned at #22 in the Music & Audio category on the Android Market (#14 on AppBrain) with other top apps such as Pandora, Shazam, PowerAMP, Winamp, Soundhound and doubleTwist and is the top rated app of its kind.
Thanks to all who have downloaded and rated/commented. If you have yet to try it out, download it free today and lets see it hit the next milestone of 250,000 downloads and top 10 in 2011.
Tuesday, December 21, 2010
Cover Art Downloader developer interview
The Apple Google, a iOS news and app review site who recently began doing some Android coverage picked me as the target for their first Android Developer Interview. Check it out @ http://goo.gl/LBU2G
New website for Android apps
So I can keep this blog relevant to Linux, Android and programming how-to's and tips, I have created a new website for my Android apps. Check it out at http://www.appsbybirbeck.com/. Although there may be some crossover here, the latest news on my Android apps can be found via the website, Facebook, and Twitter.
Monday, December 6, 2010
April fools in December?
I was hacking away last night to rewrite Wallpaper Slideshow, and I needed to reference a java file in the Android source code. I noticed the file had changed, and that a new commit had been made. The Gingerbread was done baking before the timer went off, which it did this morning with Andy Rubin's big announcement.
So on my lunch break today I thought I would upgrade to the latest SDK and spoil my dinner with some tasty new Google treats. The good thing is my applications work wonderfully, the bad thing is, this must be some kind of joke.
Here is a screenshot of the upcoming Wallpaper Slideshow settings screen in Froyo (spoiler alert, be warned):

Looks normal, and has looked the same since API level 3. Now Google hired some big name user interface designers for Gingerbread to give it a new fresh look, so I was pretty excited to try it in action. Imagine then my shock and dismay when I was greeted with the following screen:

Yes folks, THIS IS GINGERBREAD. And that doesn't even show the worst of it, the buttons, the menus, the widgets and my personal least favorite, the progress bar, all look extremely horrible. Overall the entire OS has a flat, black, pixelated and blurry look to it. It is just unbelievable in the worst sense of the word.
I can only hope that this is not a final release, that the emulator lacks some required hardware video acceleration, or Google is just playing a joke on us because this is outright atrocious. Now I will reserve full judgement until I have a Nexus S in my hand, but if this is the way it's intended to look, be ready for some well deserved ridicule from the community.
UPDATE:
Ok, so my emulator was using MDPI resources instead of HDPI. When increasing the pixel density it actually looks 100x better. I'm still not really a fan of the widgets, or the transparent options menu, but it's no where as bad as I thought initially... at least not for HDPI. I hope lower resolutions won't suffer the same pixelation as we see in the emulator, but I do look forward to the day when I can test this out on a real device.
So on my lunch break today I thought I would upgrade to the latest SDK and spoil my dinner with some tasty new Google treats. The good thing is my applications work wonderfully, the bad thing is, this must be some kind of joke.
Here is a screenshot of the upcoming Wallpaper Slideshow settings screen in Froyo (spoiler alert, be warned):
Looks normal, and has looked the same since API level 3. Now Google hired some big name user interface designers for Gingerbread to give it a new fresh look, so I was pretty excited to try it in action. Imagine then my shock and dismay when I was greeted with the following screen:
Yes folks, THIS IS GINGERBREAD. And that doesn't even show the worst of it, the buttons, the menus, the widgets and my personal least favorite, the progress bar, all look extremely horrible. Overall the entire OS has a flat, black, pixelated and blurry look to it. It is just unbelievable in the worst sense of the word.
I can only hope that this is not a final release, that the emulator lacks some required hardware video acceleration, or Google is just playing a joke on us because this is outright atrocious. Now I will reserve full judgement until I have a Nexus S in my hand, but if this is the way it's intended to look, be ready for some well deserved ridicule from the community.
UPDATE:
Ok, so my emulator was using MDPI resources instead of HDPI. When increasing the pixel density it actually looks 100x better. I'm still not really a fan of the widgets, or the transparent options menu, but it's no where as bad as I thought initially... at least not for HDPI. I hope lower resolutions won't suffer the same pixelation as we see in the emulator, but I do look forward to the day when I can test this out on a real device.
Monday, November 15, 2010
Cover Art Downloader for Android is now even faster!

Since its release to the Android Market, Cover Art Downloader has been the quickest and easiest way to tag your music collection with the appropriate album art. Version 1.2.2, was released today with 2 new features that can save you even more time.
1) Fast scrolling
With fast scrolling, you begin scrolling through your albums and you will now notice a grab handle on the right hand side of the screen where the scrollbar is. When you grab onto this handle and slide your finger, a box on-screen will let you know where in your collection you are letting you quickly find a particular album.
2) Search suggestions
You may not know this already, but you have always had the ability to filter the albums list by a search term of your choosing by pressing your hardware search button or choosing filter from the main menu. I often will enter an artists name so I can work with only the albums by that artist. Now, as you begin typing your search term, you will be presented with a list of matching artists and albums. Save yourself a few key strokes and simply click on an item in the list to filter just that artist or album title.
Many more features are on the way shortly, if you have a feature you would like to see in a future version please let me know.
Sunday, November 14, 2010
Wallpaper Slideshow for Android
Following the success of my Gnome Wallpaper Slideshow for Linux, this was one of my first Android projects. The beta was originally uploaded to the Market on October 28 2010. Today I am happy to announce the beta tag has been removed and version 1.0 of Android Wallpaper Slideshow is now available to download FREE from the Android Market.

Android Wallpaper Slideshow allows you to select a folder from your SD card that will be cycled through at a user defined interval. Pictures are scaled and cropped as needed to fill your screen in either portrait or landscape modes while preserving aspect ratio. Images are transitioned with a nice fade effect. You can optionally select to display the images in random order instead of file order. And you can select to rotate the images to match your screen orientation. Your SD card is automatically recursively scanned for all folders containing images from which you can choose from. Hidden folders, folders containing only an AlbumArt.jpg file and folders containing a .nomedia file will not be available for selection.
Wallpaper Slideshow on AppBrain
Wallpaper Slideshow is open source, visit the project page at http://code.google.com/p/android-wallpaper-slideshow/
Sunday, November 7, 2010
Getting your album art to show on Android

Traditionally, getting your album art to show on Android has been a complicated task. If your audio tracks weren't initially tagged with embedded album art or a specially named file inside the albums folder before being loaded onto the device, there was no hope of getting the artwork to be displayed. Furthermore, embedded album art on Android is only supported for MP3's, so if your music is in another format like OGG, FLAC, MP4 or AAC, then the file naming scheme for your device was the only option. To make matters worse, the filename required is inconsistent across devices. For instance if you are running stock Android, the file needs to be named AlbumArt.jpg or if your phone is running HTC Sense, it's a cryptic filename like ~hTC_The Name of My Album.jpg.
The only way to make album art show up after initially loading it onto the device was to mount the phone to a computer with USB, copy the files back over with embedded album art or copy the album art image with the correct naming convention to the sd card and store it in the proper location. Then go to Settings > Applications > Manage Applications > All > Media Storage and press Clear data, then reboot your phone. This also would delete your playlists, video thumbnails, picture metadata, etc., and the reboot would take several minutes as it rebuilds the database. What a pain!
Normally in a case like this, you would turn to the Android Market for solutions. However, until recently the only options on the market were poorly rated expensive apps. Then, Album Art Grabber Free hit the market. This grabber worked for about 75-80% of my collection, but it has a slow interface (it takes 4 clicks to set just one cover); doesn't work with various artist releases, singles or rarities; only searches for album art by artist name; doesn't allow custom artwork to be used; doesn't save album art to sd card so it can be detected by the media scanner after a wipe; doesn't embed artwork into id3 tags; artwork won't show up in 3rd party players that don't read the metadata from Androids internal database; it has a clear album art option but it [works] only on the entire collection, you cant clear a single album, but worse when you click the button, absolutely nothing happens; it is ad supported and it nags at you to donate. There are even reports of the album art not even persisting across a reboot and no way to save album art between data wipes or moving your sd card to another device, so if you frequently flash a new rom or replace your phone you will not have your album art until you download it again.
So this prompted me to write my own, Cover Art Downloader. Version 1.0 was released free on the Android Market on November 1, followed by a quick bug fix release on November 2. I am proud to announce that version 1.2 is now available and is the quickest, easiest and most accurate way to import album artwork on any device running Android 1.6 or higher.
This release features:
* 1-Click download of artwork for any individual album
* Batch download to grab all missing artwork automatically
* Can filter albums list to make albums easier to find on larger collections
* Manual searching for unknown artwork by Artist, Album or any other term
* Can set custom artwork from Gallery (SD Card)
* Option to save album art to sd card in proper location with the proper name for your device so your artwork will still be there if you wipe your phone, get a new phone or flash a new rom
* Allows clearing of artwork from individual albums
Additionally, a donate version ($1.99) is available on the market with these additional features:
* Embed album art to id3 tags
* Automatically scan for and download artwork when new albums are detected on the device
Now, you can quickly download all of your missing album artwork, have it work in 3rd party players and persist across device reboots, factory resets or replacements.
Cover Art Downloader for Android on AppBrain
Tuesday, October 26, 2010
Is the iPhone and "walled garden" approach really that bad?
I am a software developer, and as such, I have found mobile phones a great new market to focus attention on. Naturally I started developing for what I had, a T-Mobile G1 running Android. When I first got the phone, I wanted to write a Last.fm scrobbling client, but I didn't understand the whole SDK, particularly the API calls needed for such a program. As it turns out it's a fairly advanced application to write. After some time of getting nowhere, ScrobbleDroid showed up in the Market, then some time later A Simple Last.fm Scrobbler and finally the official Last.fm application. By that time I had already abandoned my efforts since I was beat to the market. What's great, is all 3 of those applications are not just free, they are open source. I could view the source code and figure out where I went wrong, which has been a huge help in what I am currently working on.
Next I decided to write an unknown call blocker. Monitoring incoming calls, and if the number was unknown or blocked it would send the call immediately to voicemail. This could be further expanded by checking numbers against an online known spammer registry. I was very disappointed then to learn that the Android SDK which supports outgoing call interception does not support intercepting incoming calls. Your application cannot prevent the phone from ringing on an incoming call.
After those two projects failed to materialise, I went back to the drawing board, but at the rate new applications were pouring into the Market I couldn't think of an original idea that really filled a gap in the Android software stack (there weren't many of them). So I continued to study the SDK and continued to think about a new app, but never wrote any code. I even would periodically check out what's cool on the iPhone for inspiration, but I never could find any cool iPhone apps that really did anything Android or an Android app didn't already do better. They were just sound makers or stupid games, and they weren't open source, in fact people were charging $1.49 - $4.99 for completely pointless and stupid software.
Finally, I had my idea, and not just 1, but 5! Two of them are not original, just a different, better approach or extra features. The first was a Phase 10 (card game) scoring application, which beats the others on the market by actually calculating score (simple I know), having a better workflow and automatically sorting the players by phase and score.
My second application was a wallpaper slideshow. It lets you select a photo gallery on your phone and will cycle through the images at a user defined interval as the phones wallpaper. It crops, resizes and rotates as needed to fill your screen.
Next I did a Starbucks card manager that lets you select a card to display as a desktop widget, so you can quickly see your balance at a glance from your home screen.
Following that I started working on another homescreen widget, to show your PS3 player score and trophies.
And finally, a Dynamic Playlist application that monitors what you listen to using your stock music player and adds recommendations from Last.fm to keep a cohesive playlist running instead of shuffle all or party shuffle which would randomly pick music from different genres. Currently, I am adding in support for popular third-party players.
A few things recently occurred to me. None of these applications would even be possible on an iPhone. First, Phase 10 Score on iOS wouldn't allow me to keep the same workflow. iOS only lets you set a single static photo as a wallpaper, it doesn't have a "live wallpapers" concept. Background applications are only supported on iOS4 and Wallpaper Slideshow would not fall into one of the seven allowable background APIs. iOS has no widgets that can be placed on your homescreen, so Starbucks Card Manager and PS3 Trophies Widget are out. iOS has no content providers and doesn't allow you to bind to other application services so I couldn't write a Dynamic Playlist plugin for iTunes. To this day you still can't even live scrobble your iTunes to Last.fm even with the official application, it requires syncing to iTunes running on your computer.
The Android emulator is great, but if I want to test my applications on one of my devices, I simply connect it to the debugger and push it onto the device. 10 seconds later it is up and running. I can then put it through an automated stress test and memory profiler to make sure it won't crash on various hardware. I don't have to pay $99 and wait 1 month for the application to be approved by Apple to run it on my own device.
If I want to test my application on any specific hardware, I simply send someone the installer. This is so simple on Android as I can send it to their Gmail account which is pushed directly to their phone. The user simply clicks 'Install' right from Gmail on their Android phone and I can even have it send me dumps and stack traces directly. Again, no paying Apple or Google for this privilege and no approval process or waiting period.
When it comes time to publish, a single $25 developer certificate covers ALL of my applications, and my applications are available to download from the Android Market in 5-10 minutes, and pushed to all mirrors in all supported markets in less than 24 hours.
The Android SDK, developer tools and emulator run on ANY computer, not just Apples OS X, and you can upload your applications to the Android Market from ANY computer. You don't have to borrow a friends Mac to test or upload your applications.
So from this developers perspective, the iPhone and walled garden approach simply does not work, and there is next to no chance that I will ever take the initiative to publish an application to iOS. The iOS platform and Apple Store are just too restrictive to develop creative applications, and I don't want to spend several months developing an application just to have it repeatedly rejected by Apple before I can even test on my own devices.
From what I can gather, I am not alone in this thinking. Android Market now has over 100,000 applications, is selling faster and iPhone and as more users leave their iPhones behind and jump ship to Android, more and more developers no longer wish to deal with the headaches of iOS development. So, Is the iPhone and "walled garden" approach really that bad? YES.
Next I decided to write an unknown call blocker. Monitoring incoming calls, and if the number was unknown or blocked it would send the call immediately to voicemail. This could be further expanded by checking numbers against an online known spammer registry. I was very disappointed then to learn that the Android SDK which supports outgoing call interception does not support intercepting incoming calls. Your application cannot prevent the phone from ringing on an incoming call.
After those two projects failed to materialise, I went back to the drawing board, but at the rate new applications were pouring into the Market I couldn't think of an original idea that really filled a gap in the Android software stack (there weren't many of them). So I continued to study the SDK and continued to think about a new app, but never wrote any code. I even would periodically check out what's cool on the iPhone for inspiration, but I never could find any cool iPhone apps that really did anything Android or an Android app didn't already do better. They were just sound makers or stupid games, and they weren't open source, in fact people were charging $1.49 - $4.99 for completely pointless and stupid software.
Finally, I had my idea, and not just 1, but 5! Two of them are not original, just a different, better approach or extra features. The first was a Phase 10 (card game) scoring application, which beats the others on the market by actually calculating score (simple I know), having a better workflow and automatically sorting the players by phase and score.
My second application was a wallpaper slideshow. It lets you select a photo gallery on your phone and will cycle through the images at a user defined interval as the phones wallpaper. It crops, resizes and rotates as needed to fill your screen.
Next I did a Starbucks card manager that lets you select a card to display as a desktop widget, so you can quickly see your balance at a glance from your home screen.
Following that I started working on another homescreen widget, to show your PS3 player score and trophies.
And finally, a Dynamic Playlist application that monitors what you listen to using your stock music player and adds recommendations from Last.fm to keep a cohesive playlist running instead of shuffle all or party shuffle which would randomly pick music from different genres. Currently, I am adding in support for popular third-party players.
A few things recently occurred to me. None of these applications would even be possible on an iPhone. First, Phase 10 Score on iOS wouldn't allow me to keep the same workflow. iOS only lets you set a single static photo as a wallpaper, it doesn't have a "live wallpapers" concept. Background applications are only supported on iOS4 and Wallpaper Slideshow would not fall into one of the seven allowable background APIs. iOS has no widgets that can be placed on your homescreen, so Starbucks Card Manager and PS3 Trophies Widget are out. iOS has no content providers and doesn't allow you to bind to other application services so I couldn't write a Dynamic Playlist plugin for iTunes. To this day you still can't even live scrobble your iTunes to Last.fm even with the official application, it requires syncing to iTunes running on your computer.
The Android emulator is great, but if I want to test my applications on one of my devices, I simply connect it to the debugger and push it onto the device. 10 seconds later it is up and running. I can then put it through an automated stress test and memory profiler to make sure it won't crash on various hardware. I don't have to pay $99 and wait 1 month for the application to be approved by Apple to run it on my own device.
If I want to test my application on any specific hardware, I simply send someone the installer. This is so simple on Android as I can send it to their Gmail account which is pushed directly to their phone. The user simply clicks 'Install' right from Gmail on their Android phone and I can even have it send me dumps and stack traces directly. Again, no paying Apple or Google for this privilege and no approval process or waiting period.
When it comes time to publish, a single $25 developer certificate covers ALL of my applications, and my applications are available to download from the Android Market in 5-10 minutes, and pushed to all mirrors in all supported markets in less than 24 hours.
The Android SDK, developer tools and emulator run on ANY computer, not just Apples OS X, and you can upload your applications to the Android Market from ANY computer. You don't have to borrow a friends Mac to test or upload your applications.
So from this developers perspective, the iPhone and walled garden approach simply does not work, and there is next to no chance that I will ever take the initiative to publish an application to iOS. The iOS platform and Apple Store are just too restrictive to develop creative applications, and I don't want to spend several months developing an application just to have it repeatedly rejected by Apple before I can even test on my own devices.
From what I can gather, I am not alone in this thinking. Android Market now has over 100,000 applications, is selling faster and iPhone and as more users leave their iPhones behind and jump ship to Android, more and more developers no longer wish to deal with the headaches of iOS development. So, Is the iPhone and "walled garden" approach really that bad? YES.
Sunday, October 10, 2010
How to secure your Ubuntu Linux desktop
A big reason a lot of people install Linux is for the extra security. While Ubuntu is a pretty secure operating system, new exploits and viruses are found every day. There are still a few simple steps you can take to secure your computer against intruders and internet exploits.
Anti-Virus is a pretty controversial topic on Linux. The popular belief is that Linux is by design immune to virues. Even though your Linux computer may not be infected, you can still host virus infected files. If you are downloading and sharing files via P2P, email or across your network with other Windows computers, anti-virus is essential. The method we take here will not consume vast amounts of system resources that slow your computer down, as is the case with most security suites on Microsoft Windows.
Regardless of operating system any computer connected to the internet should:
1) Install security updates automatically
2) Configure a firewall with a minimal set of rules
3) Install anti-virus software with updated virus definitions and regular scans
4) Protect their browser from XSS and link jacking exploits
This video will show you how to set up all of the above, simply, using only the Linux GUI. No terminal is needed.
This just scratches the surface of securing Ubuntu. Check back later for more advanced topics such as: port scan detection, brute force detection, application profiles, logging and more.
Anti-Virus is a pretty controversial topic on Linux. The popular belief is that Linux is by design immune to virues. Even though your Linux computer may not be infected, you can still host virus infected files. If you are downloading and sharing files via P2P, email or across your network with other Windows computers, anti-virus is essential. The method we take here will not consume vast amounts of system resources that slow your computer down, as is the case with most security suites on Microsoft Windows.
Regardless of operating system any computer connected to the internet should:
1) Install security updates automatically
2) Configure a firewall with a minimal set of rules
3) Install anti-virus software with updated virus definitions and regular scans
4) Protect their browser from XSS and link jacking exploits
This video will show you how to set up all of the above, simply, using only the Linux GUI. No terminal is needed.
This just scratches the surface of securing Ubuntu. Check back later for more advanced topics such as: port scan detection, brute force detection, application profiles, logging and more.
Thursday, October 7, 2010
Getting ADB (Android Debugger) to work on Ubuntu 10.04+
In my spare time I enjoy writing Android applications and exploring the vast Android SDK. Though I have not yet published any apps to the Market, I have a few going through final QA testing which will be released soon.
Often times, I will need to get an adb shell, watch the logfiles on the phone, or want push my apps to my devices for testing or debugging on a real device. I do most of my coding in my spare time on my laptop which was running Ubuntu 10.04, and any time I tried to open adb it wouldn't connect to the device. I would just see "????????" as the serial number and "no permissions" as the device name. As a result, I have been having to use my workstation which runs Ubuntu 9.10 for all of my debugging.
I upgraded early to Ubuntu 10.10 as I often like to test the latest Ubuntu betas and release candidates. I was also hoping the latest release would fix my issue, which unfortunately, was not the case. So I started out on a quest to get to the bottom of things.
It didn't take long to discover that it's a permissions issue, and the recommended fix I found repeatedly was to kill adb server and restart it as root. I quickly tested that and surely it worked, however that doesn't work so well for starting it via Eclipse and ADT and I never want to run a program as root without good reason.
It works in 9.10, it's just a permissions issue, so I thought a quick change to the new hal rules in Ubuntu were in order, but I couldn't find any such documentation on the workings of hal and its permissions. Lots of digging around and I found a comment on XDA with a udev rule. Opened up the terminal and typed 'lsusb -v | grep 0bb4' and sure enough that was the correct vendor id for my HTC Evo.
So here are the steps I took to get it working:
I hope that helps you. If you need to find your devices vendor id you can try this:
P.S. Please feel free to add your device and vendor id in the comments to save others some trouble.
Often times, I will need to get an adb shell, watch the logfiles on the phone, or want push my apps to my devices for testing or debugging on a real device. I do most of my coding in my spare time on my laptop which was running Ubuntu 10.04, and any time I tried to open adb it wouldn't connect to the device. I would just see "????????" as the serial number and "no permissions" as the device name. As a result, I have been having to use my workstation which runs Ubuntu 9.10 for all of my debugging.
I upgraded early to Ubuntu 10.10 as I often like to test the latest Ubuntu betas and release candidates. I was also hoping the latest release would fix my issue, which unfortunately, was not the case. So I started out on a quest to get to the bottom of things.
It didn't take long to discover that it's a permissions issue, and the recommended fix I found repeatedly was to kill adb server and restart it as root. I quickly tested that and surely it worked, however that doesn't work so well for starting it via Eclipse and ADT and I never want to run a program as root without good reason.
It works in 9.10, it's just a permissions issue, so I thought a quick change to the new hal rules in Ubuntu were in order, but I couldn't find any such documentation on the workings of hal and its permissions. Lots of digging around and I found a comment on XDA with a udev rule. Opened up the terminal and typed 'lsusb -v | grep 0bb4' and sure enough that was the correct vendor id for my HTC Evo.
So here are the steps I took to get it working:
echo "SUBSYSTEM==\"usb\", SYSFS{idVendor}==\"0bb4\", MODE=\"0666\"" | sudo tee /etc/udev/rules.d/51-android.rules
sudo restart udev
I hope that helps you. If you need to find your devices vendor id you can try this:
$ sudo lsusb -v | grep -C5 Android 2>/dev/null
  bMaxPacketSize0        64
  idVendor           0x0bb4 High Tech Computer Corp.
  idProduct          0x0c8d
  bcdDevice            2.26
  iManufacturer           1 HTC
  iProduct                2 Android Phone
  iSerial                 3 HT05JHL0XXXX
  bNumConfigurations      1
  Configuration Descriptor:
    bLength                 9
    bDescriptorType         2
P.S. Please feel free to add your device and vendor id in the comments to save others some trouble.
Monday, June 28, 2010
My top 10 Android apps
Of course a phones priority should be to make calls, but today people expect so much more from these powerful mini computers resting in their pockets and purses. The Android operating system is the most powerful and fastest selling mobile phone operating system available today. Not only does it enable you to make phone calls, but to send text messages and chat with your friends online; browse the web; check your email; purchase and listen to music; take and share pictures and video; manage your contacts, calendar and to-do lists, gps navigation and much more. With Android smartphones using more data monthly than all other smartphones combined, they are truly connecting the masses online wherever they may be.
Android definitely does not fall short when it comes to customization however. With a market accessible directly from the phone and growing in applications by thousands every week, it can be difficult for a new user to sift through everything out there and pick the few that really make the phone their own. I have pointed out my top 10 favorite applications with a short description of each to help you as a starting point.
1: Google Voice (free)
2: Swype (beta, free, android exclusive)
3: Launcher Pro (beta, free, android exclusive)
4: Trackmaster ($4.99, android exclusive)
5: Connectbot (free, android exclusive)
6: Pandora (free)
7: Last.fm (free)
8: Andchat (free, android exclusive)
9: ShopSavvy (free)
10: WRC (free)
Honorable mentions:
Facebook: An essential app to most, however the featured Android phones these days usally come with Facebook support built right in with much better integration than the offical application.
Twitter: Same as Facebook, most phones come with better support built-in and the official app requires Android 2.0 or higher. Twidroid is a good Twitter client, but I have a strict policy about giving my sensitive login information to 3rd parties.
Spare Parts: Some developers don't know how to write applications for mobile devices and can eat through your battery pretty quickly. This is a great utility to see what applications are using up your battery as well as tweaking some phone options for longer battery life, but if you stick to well known programs from good developers shouldn't needed. If you find your battery isn't performing well download it and look for applications with high partial wake lock usage.
Astro File Manager: A good utility for managing phone storage, all of which can be accomplished using the built-in operating system tools or by connecting your phone to a computer via USB. It is good to keep around but will not be needed daily.
Techbuzz: A nice RSS reader and widget, however it lacks the ability to add your own feeds and I much prefer the news app included with Sense UI. Newsrob is supposed to be a good reader also, but requires your Google account login and password which makes it a deal killer for me.
Shazam: Pretty cool program that uses the phones mic to identify music playing. If the list was the top 15 applications, it would be included for sure.
ShootMe: Takes screenshots (like the ones here), but unless you are using an HTC Evo, it requires the device to be rooted.
Weatherbug: Good weather application with current conditions and forecast, a good widget also, but it eats through your battery like crazy and I have no problems with the default Sense UI weather app.
Fring: Video chat. Supposed to be good but is currently broken on the Evo and suffers horrible video lag.
I hope this list helps you get started using and customizing your new Android phone, or can introduce long time users to new applications. If you have a favorite I missed, please leave it in the comments below.
Android definitely does not fall short when it comes to customization however. With a market accessible directly from the phone and growing in applications by thousands every week, it can be difficult for a new user to sift through everything out there and pick the few that really make the phone their own. I have pointed out my top 10 favorite applications with a short description of each to help you as a starting point.
1: Google Voice (free)

2: Swype (beta, free, android exclusive)

3: Launcher Pro (beta, free, android exclusive)

4: Trackmaster ($4.99, android exclusive)

5: Connectbot (free, android exclusive)

6: Pandora (free)

7: Last.fm (free)

8: Andchat (free, android exclusive)

9: ShopSavvy (free)

10: WRC (free)

Honorable mentions:
Facebook: An essential app to most, however the featured Android phones these days usally come with Facebook support built right in with much better integration than the offical application.
Twitter: Same as Facebook, most phones come with better support built-in and the official app requires Android 2.0 or higher. Twidroid is a good Twitter client, but I have a strict policy about giving my sensitive login information to 3rd parties.
Spare Parts: Some developers don't know how to write applications for mobile devices and can eat through your battery pretty quickly. This is a great utility to see what applications are using up your battery as well as tweaking some phone options for longer battery life, but if you stick to well known programs from good developers shouldn't needed. If you find your battery isn't performing well download it and look for applications with high partial wake lock usage.
Astro File Manager: A good utility for managing phone storage, all of which can be accomplished using the built-in operating system tools or by connecting your phone to a computer via USB. It is good to keep around but will not be needed daily.
Techbuzz: A nice RSS reader and widget, however it lacks the ability to add your own feeds and I much prefer the news app included with Sense UI. Newsrob is supposed to be a good reader also, but requires your Google account login and password which makes it a deal killer for me.
Shazam: Pretty cool program that uses the phones mic to identify music playing. If the list was the top 15 applications, it would be included for sure.
ShootMe: Takes screenshots (like the ones here), but unless you are using an HTC Evo, it requires the device to be rooted.
Weatherbug: Good weather application with current conditions and forecast, a good widget also, but it eats through your battery like crazy and I have no problems with the default Sense UI weather app.
Fring: Video chat. Supposed to be good but is currently broken on the Evo and suffers horrible video lag.
I hope this list helps you get started using and customizing your new Android phone, or can introduce long time users to new applications. If you have a favorite I missed, please leave it in the comments below.
Friday, June 25, 2010
How to improve battery life on your HTC Evo 4G (or any Android smartphone)
INTRODUCTION:
The HTC Evo 4G is an awesome smartphone with its 4G data network, Wi-Fi hotspot tethering, large high resolution display, fast 1GHz snapdragon processor, 512MB memory, 8MP camera with dual LED flash capable of 720p video recording and front facing vga camera for video chat. Hardware wise, it is the current top of the line smartphone (with how fast Android moves there will always be something better in a month or two), but all this power isn't free, it comes at the cost of battery consumption.
There is a lot of false claims online regarding the "abysmal" battery life of the Evo. This was started by a blogger who reported getting 10 hours out of the device while using it for checking email repeatedly, using GPS navigation, listening to music and watching tv. He was also using Advanced Task Killer, which is known to use more battery than it saves. Can someone please explain to me how 10 hours doing all that is bad battery performance? Regardless, complaints have escalated with people now claiming their Evo's die in 3-4 hours from a full charge and cannot even last a night sitting idle in standby. I personally believe most of these claims are coming from the likes of iPhone fanboys who feel threatened by the Evo (or other featured Android smartphones) which have never actually set their hands on the device and are just spreading F.U.D. about the internet in an attempt to defend their "magical" IDevices.
The battery on the Evo is 1500mAh, as far as I know it is the largest standard cellphone battery, but I haven't researched it that much. It is fully capable of making it through an entire day with moderate usage and uses very little power draw at idle even with the sub-optimal default settings. With just a few settings tweaked and a little knowledge of the Android operating system, you can get well over 24 hours of use on a single charge without the need of larger batteries, addtional batteries or usb charging packs (although those options are available if you need them).
THE PROOF:
SETTINGS:
New batteries take several charge and discharge cycles to reach full capacity, so the first thing you should do with your Evo (or any mobile device) is turn the power on and let the battery drain completely then charge the battery to 100% with the power turned off (don't worry, a full charge only takes ~2 1/2 hours from 0%). This is the quickest way to condition your battery and should be repeated every few months to keep the battery in tip-top shape.
With the battery conditioned, phone booted and on the home screen, press the Menu button and then press Settings. Press Wireless & networks, then press Wi-Fi settings. Un-check Network Notification.
Network notification constantly scans for open wireless networks to connect to whenever Wi-Fi is turned on, this scanning is a major draw on battery. With network notifications turned off, you can still connect to any wireless hotspots you have previously connected to just by turning Wi-Fi on and being in range. To add a new wireless network in the future, return to this screen and it will scan for any access points within range. Press on the network name to connect and it will be saved for future use.
From the Wi-Fi settings screen, press the Menu button and then press Advanced. Press on Wi-Fi sleep policy and set it to Never. Wi-Fi data requires less power draw than 3G data services and very little draw at idle, however by default the Wi-Fi shuts down shortly after the screen is turned off. If you have any services or applications still running, the phone will try to re-establish a Wi-Fi connection and then disconnect again any time data is requested. This constant connect and disconnect requires way more power than just leaving Wi-Fi idle.
Return to the Wireless & network settings by pressing Back twice and then press 4G settings. From here un-check Network notification. Similar to Wi-Fi network notification this constantly scans for 4G networks in your area to connect to. 4G is a power hog and constantly scanning is even more so. You should only be using 4G when you need the increased bandwith and turning 4G on will automatically connect to the best 4G network in range so it should not need to constantly be scanning.
Press back twice again to return to the main Settings screen and press Sound & display. In here un-check both Phone vibrate and Haptic feedback. Phone vibrate is self-explanatory, it vibrates the phone when it rings, the vibration is very weak and with your volume set appropriately the phone will be audible. It will still vibrate in silent mode with this turned off. Haptic feedback vibrates the phone under your finger when you press on buttons, it makes the phone seem more responsive but each vibrate takes extra power draw. This does not turn off Haptic feedback for the keyboard, only the OS. The phone might seem bland after disabling it, but you get use to it quickly.
Continue down this list to the Display settings and press Brightness. Make sure Automatic brightness is checked (the default setting) and press OK. Now press on Screen timeout and set this to 1 minute (default setting) or lower. These are pretty self explanatory. Automatic brightness will automatically adjust the brightness depending on the ambient lighting. I have always found the screen to be readable outside in direct light or in bed with lights out using this setting.
Return again to the main Settings by pressing back and press Accounts & sync. Go through the list of applications listed and set the syncing schedule for each to an appropriate timeout. I have weather at 1 hour and everything else at 2 hours or Never. I prefer manual syncing so I am not disturbed constantly by email, facebook, twitter or news updates since I am at my desktop all day and already get notified of such events. When I am away from my desktop, I use the phones applications to manually check for updates when needed. Set these to whatever is appropriate to what software you have installed and how you use them.
GENERAL USAGE TIPS:
DO NOT USE TASK KILLERS OR OVERCLOCK UTILITIES. Android is perfectly capable of managing your memory and running processes all on its own without user intervention. It will gracefully close down applications that are idle or when more resources are needed. Task killers run in the background, constantly polling for applications to force close. This eats up way more battery than it saves. In the rare case that you do need to force close an application you can do this by going to Settings > Applications > Manage applications, press the application, then press force stop. Android will also automatically underclock the processor to the minimum required level needed and to almost nothing when the screen is off and no applications are active. If an application is constantly running in the background when it shouldn't, uninstall the application, rate it poorly and leave a comment to the developer to fix their application.
Use the Sense Widgets or Android Power Toggle widget to toggle 4G, Wi-Fi, Bluetooth and GPS on and off as needed. 4G uses a lot of battery to feed that up to 10Mbps connection, only enable it when you need the extra bandwidth. Wi-Fi can generally be left on as it uses little draw at idle and less draw than 3G for data, but if there will be no Wi-Fi networks in range for a while, turn it off. Bluetooth should only be on when its being used period. GPS uses no power if no applications are currently requesting location data from the API but make sure you close any applications that require a constant GPS lock, I prefer to use cellular location data instead for general location unless I need fine location which requires GPS such as Google Navigation. If you know you will be away for an extended period of time without the ability to charge also turn off auto-sync for all applications.
Use the power button to turn off your display instead of just letting the screen timeout take care of it. Sure, this isn't a big thing especially if you have your screen timeout set low, but every minute your screen is on idle, is another minute you can't use it later.
Use the Back button to exit applications instead of the Home button. This tells Android you are done with the application and to either close the activity immediately or give it priority to close when resources are needed. Pressing the Home button keeps the activity running as normal.
Install the application Spare Parts from the Android Market. Use it to keep an eye on applications requesting a Partial wake lock. This means that those applications are requesting the phone to stay awake even when the screen is off, preventing the phone from ever going fully to sleep. Open Spare Parts and press Battery history, then select Partial wake usage. All applications will use a partial wake lock at some point, but keep an eye on this list for anything that has a high percentage of wake locks and either check the settings of that application or remove it and vote it down in the Market, the app is broken.
You can disable Sense UI and run the vanilla Android interface which will increase the speed (as if the phones aren't fast enough already) and battery life (should be acceptible if you followed the other recommendations). After using Sense, the vanialla Android interface seems lacking, but its acceptable and will greatly improve when Android 2.2 (Froyo) is released for Evo "Very Soon". Do disable Sense UI go to Settings > Applications > Manage Applications > HTC Sense. Press Clear defaults then press Force stop. When you return to the home screen, check the Default checkbox and press Launcher. To enable Sense UI again, repeat these steps but clear defaults and force stop Launcher instead of HTC Sense.
IN CLOSING:
There is an update planned for the week of June 28, 2010 which fixes a known bug with Facebook syncing in Sense UI and will improve battery life. When Android 2.2 (Froyo) hits the Evo "Very Soon", the battery life will be improved significantly.
With everything that these phones are capable of, the battery to the contrary of what some bloggers will have you believe, is actually quite amazing and will last longer than any "magical" smartphone.
Keep in mind batteries DO die. If you have done all of these suggestions, and you are truly seeing poor battery life, you have a bad battery, have it replaced under warranty.
I hope this post was useful to you, if you have any other suggestions please leave them in the comments below.
The HTC Evo 4G is an awesome smartphone with its 4G data network, Wi-Fi hotspot tethering, large high resolution display, fast 1GHz snapdragon processor, 512MB memory, 8MP camera with dual LED flash capable of 720p video recording and front facing vga camera for video chat. Hardware wise, it is the current top of the line smartphone (with how fast Android moves there will always be something better in a month or two), but all this power isn't free, it comes at the cost of battery consumption.
There is a lot of false claims online regarding the "abysmal" battery life of the Evo. This was started by a blogger who reported getting 10 hours out of the device while using it for checking email repeatedly, using GPS navigation, listening to music and watching tv. He was also using Advanced Task Killer, which is known to use more battery than it saves. Can someone please explain to me how 10 hours doing all that is bad battery performance? Regardless, complaints have escalated with people now claiming their Evo's die in 3-4 hours from a full charge and cannot even last a night sitting idle in standby. I personally believe most of these claims are coming from the likes of iPhone fanboys who feel threatened by the Evo (or other featured Android smartphones) which have never actually set their hands on the device and are just spreading F.U.D. about the internet in an attempt to defend their "magical" IDevices.
The battery on the Evo is 1500mAh, as far as I know it is the largest standard cellphone battery, but I haven't researched it that much. It is fully capable of making it through an entire day with moderate usage and uses very little power draw at idle even with the sub-optimal default settings. With just a few settings tweaked and a little knowledge of the Android operating system, you can get well over 24 hours of use on a single charge without the need of larger batteries, addtional batteries or usb charging packs (although those options are available if you need them).
THE PROOF:


SETTINGS:
New batteries take several charge and discharge cycles to reach full capacity, so the first thing you should do with your Evo (or any mobile device) is turn the power on and let the battery drain completely then charge the battery to 100% with the power turned off (don't worry, a full charge only takes ~2 1/2 hours from 0%). This is the quickest way to condition your battery and should be repeated every few months to keep the battery in tip-top shape.
With the battery conditioned, phone booted and on the home screen, press the Menu button and then press Settings. Press Wireless & networks, then press Wi-Fi settings. Un-check Network Notification.

Network notification constantly scans for open wireless networks to connect to whenever Wi-Fi is turned on, this scanning is a major draw on battery. With network notifications turned off, you can still connect to any wireless hotspots you have previously connected to just by turning Wi-Fi on and being in range. To add a new wireless network in the future, return to this screen and it will scan for any access points within range. Press on the network name to connect and it will be saved for future use.
From the Wi-Fi settings screen, press the Menu button and then press Advanced. Press on Wi-Fi sleep policy and set it to Never. Wi-Fi data requires less power draw than 3G data services and very little draw at idle, however by default the Wi-Fi shuts down shortly after the screen is turned off. If you have any services or applications still running, the phone will try to re-establish a Wi-Fi connection and then disconnect again any time data is requested. This constant connect and disconnect requires way more power than just leaving Wi-Fi idle.

Return to the Wireless & network settings by pressing Back twice and then press 4G settings. From here un-check Network notification. Similar to Wi-Fi network notification this constantly scans for 4G networks in your area to connect to. 4G is a power hog and constantly scanning is even more so. You should only be using 4G when you need the increased bandwith and turning 4G on will automatically connect to the best 4G network in range so it should not need to constantly be scanning.

Press back twice again to return to the main Settings screen and press Sound & display. In here un-check both Phone vibrate and Haptic feedback. Phone vibrate is self-explanatory, it vibrates the phone when it rings, the vibration is very weak and with your volume set appropriately the phone will be audible. It will still vibrate in silent mode with this turned off. Haptic feedback vibrates the phone under your finger when you press on buttons, it makes the phone seem more responsive but each vibrate takes extra power draw. This does not turn off Haptic feedback for the keyboard, only the OS. The phone might seem bland after disabling it, but you get use to it quickly.

Continue down this list to the Display settings and press Brightness. Make sure Automatic brightness is checked (the default setting) and press OK. Now press on Screen timeout and set this to 1 minute (default setting) or lower. These are pretty self explanatory. Automatic brightness will automatically adjust the brightness depending on the ambient lighting. I have always found the screen to be readable outside in direct light or in bed with lights out using this setting.


Return again to the main Settings by pressing back and press Accounts & sync. Go through the list of applications listed and set the syncing schedule for each to an appropriate timeout. I have weather at 1 hour and everything else at 2 hours or Never. I prefer manual syncing so I am not disturbed constantly by email, facebook, twitter or news updates since I am at my desktop all day and already get notified of such events. When I am away from my desktop, I use the phones applications to manually check for updates when needed. Set these to whatever is appropriate to what software you have installed and how you use them.
GENERAL USAGE TIPS:
DO NOT USE TASK KILLERS OR OVERCLOCK UTILITIES. Android is perfectly capable of managing your memory and running processes all on its own without user intervention. It will gracefully close down applications that are idle or when more resources are needed. Task killers run in the background, constantly polling for applications to force close. This eats up way more battery than it saves. In the rare case that you do need to force close an application you can do this by going to Settings > Applications > Manage applications, press the application, then press force stop. Android will also automatically underclock the processor to the minimum required level needed and to almost nothing when the screen is off and no applications are active. If an application is constantly running in the background when it shouldn't, uninstall the application, rate it poorly and leave a comment to the developer to fix their application.
Use the Sense Widgets or Android Power Toggle widget to toggle 4G, Wi-Fi, Bluetooth and GPS on and off as needed. 4G uses a lot of battery to feed that up to 10Mbps connection, only enable it when you need the extra bandwidth. Wi-Fi can generally be left on as it uses little draw at idle and less draw than 3G for data, but if there will be no Wi-Fi networks in range for a while, turn it off. Bluetooth should only be on when its being used period. GPS uses no power if no applications are currently requesting location data from the API but make sure you close any applications that require a constant GPS lock, I prefer to use cellular location data instead for general location unless I need fine location which requires GPS such as Google Navigation. If you know you will be away for an extended period of time without the ability to charge also turn off auto-sync for all applications.
Use the power button to turn off your display instead of just letting the screen timeout take care of it. Sure, this isn't a big thing especially if you have your screen timeout set low, but every minute your screen is on idle, is another minute you can't use it later.
Use the Back button to exit applications instead of the Home button. This tells Android you are done with the application and to either close the activity immediately or give it priority to close when resources are needed. Pressing the Home button keeps the activity running as normal.
Install the application Spare Parts from the Android Market. Use it to keep an eye on applications requesting a Partial wake lock. This means that those applications are requesting the phone to stay awake even when the screen is off, preventing the phone from ever going fully to sleep. Open Spare Parts and press Battery history, then select Partial wake usage. All applications will use a partial wake lock at some point, but keep an eye on this list for anything that has a high percentage of wake locks and either check the settings of that application or remove it and vote it down in the Market, the app is broken.
You can disable Sense UI and run the vanilla Android interface which will increase the speed (as if the phones aren't fast enough already) and battery life (should be acceptible if you followed the other recommendations). After using Sense, the vanialla Android interface seems lacking, but its acceptable and will greatly improve when Android 2.2 (Froyo) is released for Evo "Very Soon". Do disable Sense UI go to Settings > Applications > Manage Applications > HTC Sense. Press Clear defaults then press Force stop. When you return to the home screen, check the Default checkbox and press Launcher. To enable Sense UI again, repeat these steps but clear defaults and force stop Launcher instead of HTC Sense.


IN CLOSING:
There is an update planned for the week of June 28, 2010 which fixes a known bug with Facebook syncing in Sense UI and will improve battery life. When Android 2.2 (Froyo) hits the Evo "Very Soon", the battery life will be improved significantly.
With everything that these phones are capable of, the battery to the contrary of what some bloggers will have you believe, is actually quite amazing and will last longer than any "magical" smartphone.
Keep in mind batteries DO die. If you have done all of these suggestions, and you are truly seeing poor battery life, you have a bad battery, have it replaced under warranty.
I hope this post was useful to you, if you have any other suggestions please leave them in the comments below.
Sunday, May 23, 2010
How to create a desktop wallpaper slideshow in Ubuntu Linux 10.04 (Lucid Lynx)
A popular feature in other OS's and one quite often requested in Linux, is the ability to cycle through a directory of images as your desktop background. Gnome and therefore Ubuntu actually do support this already and have for a long time, however its not easily configured in the GUI like setting a static wallpaper is.
If you go to your appearance preferences and change your background, you may notice a stack of images. This is the 'Cosmos' wallpaper. It is an XML file containing the paths to multiple images. To make your own slideshow, you need to copy this XML file and edit the image paths to the locations of the files you wish to display. Simple enough when you know how to do it, but a bit tedious to say the least.
Today I will show you step-by-step how to create and apply your own wallpaper slideshow, and to make it really easy for you I have created a utility to automate the process.
To use my program for automating this process:
1) Download 'Wallpaper Slideshow'
2) Extract the 125178-wallpaper.tar.gz
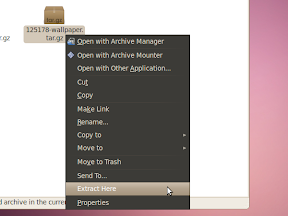
3) Double click 'wallpaper'
4) Click 'Run'
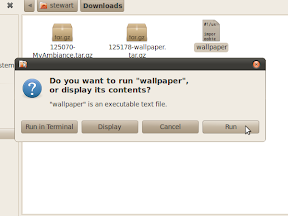
5) Select folder containing your pictures
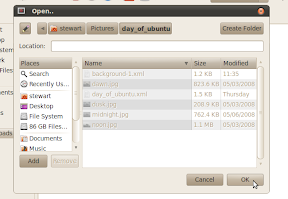
6) Change the time to display each image and transition time (Optional)
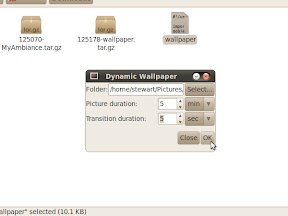
7) Click 'OK'
Hopefully Gnome will incorporate a similar utility directly into the Appearance preferences in future release.
If you go to your appearance preferences and change your background, you may notice a stack of images. This is the 'Cosmos' wallpaper. It is an XML file containing the paths to multiple images. To make your own slideshow, you need to copy this XML file and edit the image paths to the locations of the files you wish to display. Simple enough when you know how to do it, but a bit tedious to say the least.
Today I will show you step-by-step how to create and apply your own wallpaper slideshow, and to make it really easy for you I have created a utility to automate the process.
To use my program for automating this process:
1) Download 'Wallpaper Slideshow'
2) Extract the 125178-wallpaper.tar.gz
3) Double click 'wallpaper'
4) Click 'Run'
5) Select folder containing your pictures
6) Change the time to display each image and transition time (Optional)
7) Click 'OK'
Hopefully Gnome will incorporate a similar utility directly into the Appearance preferences in future release.
Tuesday, May 18, 2010
How to install proprietary codecs on Ubuntu Linux 10.04 (Lucid Lynx) Flash, MP3, DVD
Most Linux distributions, Ubuntu included, ship with only "free software". Not just free as in price, but free as in freedom. That is software that is free of patents, licensing restrictions, copyright restrictions and DRM (digital rights management), where the source is fully available for anyone to modify or extend. Free software has many benefits and in many cases, free software is of much greater quality than its proprietary or commercial counterparts.
Shipping without proprietary software, also means shipping without proprietary media codecs such as Mp3, AAC, Flash, Mpeg4 (DVD) or h.264 (HTML5, Blu-Ray and many others). Instead they come with codecs such as Ogg Vorbis and Flac for music and Theora for video. These are wonderful formats and I am lucky to have all my computers and devices running Linux so I can take full advantage of them. However, device support across the board is not so great, and for those less fortunate, or those just getting into Linux, who might have large collections of media stored in "bad" formats, their media will not play out-of-box on Linux. You may simply just wish to watch YouTube, play your own DVD's, or listen to music purchased online from the Ubuntu One Music store for instance, which also because of licensing constraints and even because of legal issues in some countries cannot be played on a fresh install of Linux.
Well have no fear, you can play pretty much anything on Linux, very easily, you don't even need to visit the terminal. Just follow my simple video below:
If you don't already have Flash installed and cannot watch the video here is what to do:
1) Open 'Software Center' from the Applications menu
2) Search for 'Ubuntu restricted extras' and click 'Install' then enter your password at the prompt -- the install may take some time, it is downloading and installing tons of media codecs
You now have support for most media except for playing back encrypted (commercial) DVD's, to add support for encrypted DVD's:
3) Press 'Alt' and 'F2' on your keyboard at the same time to bring up the run dialog
4) Type 'gksudo /usr/share/doc/libdvdread4/install-css.sh' and click 'Run' -- the command will run and you will not see a confirmation unless you check the 'Run in terminal' option, either way it will only take a few seconds
That's it, You can playback just about all of the popular media codecs in use today! Most people will can stop at this point.
So what about the more obscure formats? If you want to be able to play just about any format imaginable (and then some) there are just a few more steps. This is one of the few times that I will request you use a terminal, because it really is a much easier route to take.
1) Open a new terminal by going to your Applications menu, then Accessories and click 'Terminal'
2) Copy and paste the following command and press Enter:
5) Search for 'non-free codecs' and click 'Install'
Shipping without proprietary software, also means shipping without proprietary media codecs such as Mp3, AAC, Flash, Mpeg4 (DVD) or h.264 (HTML5, Blu-Ray and many others). Instead they come with codecs such as Ogg Vorbis and Flac for music and Theora for video. These are wonderful formats and I am lucky to have all my computers and devices running Linux so I can take full advantage of them. However, device support across the board is not so great, and for those less fortunate, or those just getting into Linux, who might have large collections of media stored in "bad" formats, their media will not play out-of-box on Linux. You may simply just wish to watch YouTube, play your own DVD's, or listen to music purchased online from the Ubuntu One Music store for instance, which also because of licensing constraints and even because of legal issues in some countries cannot be played on a fresh install of Linux.
Well have no fear, you can play pretty much anything on Linux, very easily, you don't even need to visit the terminal. Just follow my simple video below:
If you don't already have Flash installed and cannot watch the video here is what to do:
1) Open 'Software Center' from the Applications menu
2) Search for 'Ubuntu restricted extras' and click 'Install' then enter your password at the prompt -- the install may take some time, it is downloading and installing tons of media codecs
You now have support for most media except for playing back encrypted (commercial) DVD's, to add support for encrypted DVD's:
3) Press 'Alt' and 'F2' on your keyboard at the same time to bring up the run dialog
4) Type 'gksudo /usr/share/doc/libdvdread4/install-css.sh' and click 'Run' -- the command will run and you will not see a confirmation unless you check the 'Run in terminal' option, either way it will only take a few seconds
That's it, You can playback just about all of the popular media codecs in use today! Most people will can stop at this point.
So what about the more obscure formats? If you want to be able to play just about any format imaginable (and then some) there are just a few more steps. This is one of the few times that I will request you use a terminal, because it really is a much easier route to take.
1) Open a new terminal by going to your Applications menu, then Accessories and click 'Terminal'
2) Copy and paste the following command and press Enter:
echo "deb http://packages.medibuntu.org/ lucid free non-free" | sudo tee -a /etc/apt/sources.listwget -q http://packages.medibuntu.org/medibuntu-key.gpg -O- | sudo apt-key add - && sudo apt-get update5) Search for 'non-free codecs' and click 'Install'
Monday, May 17, 2010
How to change titlebar button location on Ubuntu 10.04 Lucid Lynx
Why did Canonical designers decide to put the title bar buttons on the totally unusable position of the left hand side? I can bet you a pretty big part of it is because Canonical has hired a new design team to work on the new branding, and they happen to all be using the totally unusable Macintosh OS X. While I'm not going to go into the details of the usability issues with LHS buttons vs RHS buttons or the politics of Canonical using Mac's to design Ubuntu, what I will do is show you how to change them back to the "Correct" location on the right hand side.
Like most things with Linux there are several ways to accomplish this (and without touching the terminal). You can:
1) Use gconf-editor
2) Use Ubuntu Tweak (which sets the gconf key for you)
3) Customize an existing RHS theme
However, all of these methods will reset back to the left the instant you go clicking around in your appearance preferences. If you want to make it stick and be able to switch themes at any time you will need a new theme. You can either download a theme or create one yourself very easily.
The video below will show you have to create a new RHS theme.
Now you have the benefit of keeping the default theme but with the button layout changed, and you can switch between LHS, RHS or any other theme as you wish, without having to reset your tweaks or gconf keys each time you change your appearance settings, which for most people means finding your old bookmark or searching Google to find those confusing instructions again.
If you are the type that would rather download the theme, I have made my customized theme available. As an added bonus, it also adds the application icon to the menu.
1) Download Ambiance (Right)
2) Go to the System menu and select Preferences > Appearance
4) On the 'Theme' tab, click the 'Install' button
5) Find '125070-MyAmbiance.tar.gz' in your Downloads folder and click 'Open'
6) Select the 'MyAmbiance' theme from the list
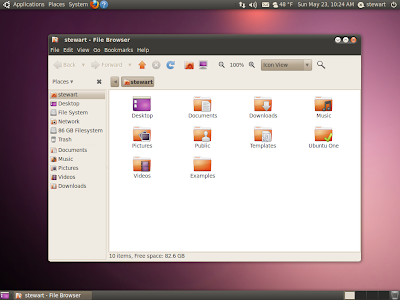
At least those designers only job is the artwork. I would hate to see Gnome's Nautilus suffer to the lackluster usability of Apple's Finder.
Like most things with Linux there are several ways to accomplish this (and without touching the terminal). You can:
1) Use gconf-editor
2) Use Ubuntu Tweak (which sets the gconf key for you)
3) Customize an existing RHS theme
However, all of these methods will reset back to the left the instant you go clicking around in your appearance preferences. If you want to make it stick and be able to switch themes at any time you will need a new theme. You can either download a theme or create one yourself very easily.
The video below will show you have to create a new RHS theme.
Now you have the benefit of keeping the default theme but with the button layout changed, and you can switch between LHS, RHS or any other theme as you wish, without having to reset your tweaks or gconf keys each time you change your appearance settings, which for most people means finding your old bookmark or searching Google to find those confusing instructions again.
If you are the type that would rather download the theme, I have made my customized theme available. As an added bonus, it also adds the application icon to the menu.
1) Download Ambiance (Right)
2) Go to the System menu and select Preferences > Appearance
4) On the 'Theme' tab, click the 'Install' button
5) Find '125070-MyAmbiance.tar.gz' in your Downloads folder and click 'Open'
6) Select the 'MyAmbiance' theme from the list
At least those designers only job is the artwork. I would hate to see Gnome's Nautilus suffer to the lackluster usability of Apple's Finder.
Tuesday, May 11, 2010
Debunking Linux #2: A Tour of Ubuntu Linux
One of the most common things I hear about Linux is that "It doesn't do anything" or "To do anything you are required to type a bunch of commands in the terminal". This spawns likely from 2 things:
1) From the infancy of the GUI in the mid-late '90s. But what was it pitted against? Windows 95 and Windows 98 in the Windows camp, and System 7 and System 8 on the Mac side of things (if you want to even consider a Mac side existed in that period before Microsoft bailed out Apple). The Linux GUI at the time consisted of windowing toolkits left over from Unix which was heavily console based. Gnome hadn't reached version 1 yet and KDE was not even a sparkle in someones eye. Would you still compare the latest OS X to Windows 95? Hell, I would even argue that the Windows 95 GUI was more functional then than the OS X of today! But that's may be a topic for another time. So why do people still compare the '70s Unix desktop to the Linux desktop of the 2010s? Because, either they haven't bothered to take a look at a recent release or have never bothered to look personally at any release and are just repeating the F.U.D they read online.
2) Because a lot of online documentation and tutorials reference how to do things via a terminal. There is nothing wrong with this, the terminal is easily accessed and very powerful. Often times it is much quicker to type a command (or copy and paste if you are following a guide), than it is to interact with a GUI. And it is definitely a lot easier to walk someone through a one line command than to try to explain to them every single mouse movement, button press and keystroke in a GUI and having to use outlined screenshots and videos to convey your information.
Ubuntu Linux 10.04 LTS (Lucid Lynx) was just released on April 29. It is a modern Linux distribution and features the latest Gnome Desktop for its user interface. They both follow a strict 6 month release cycle between releases and almost daily updates between releases. This ensures your computer is always up to date with the latest bug fixes, security enhancements and new features available. No more waiting 6 years between OS releases only to get a new theme and new hardware incompatibilities. This release adds two new themes (with a high resemblance to OS X), faster boot up and shutdown speeds, social networking integration, better desktop integration with Ubuntu One giving you 2GB of free cloud storage, a new Music Store and a lot more.
In the last Debunking Linux we looked at how fast and easy it is to install Ubuntu. Today we will look at what you get by default when you install it. The following video contains only software installed by default. The only setup done prior is installing video drivers, setting up email, chat and broadcast accounts and setting location. All of this is done easily using the menus on the top right of the screen. Also MP3 support was installed which you are prompted to install the first time you open Rhythmbox or access the Ubuntu One Music Store. Warning, the video moves very fast but it is the best I could do trying to cram so many features into the 10 minute constraints of YouTube.
Here is a list of what we just saw:
1) Installing software through the Ubuntu Software Center
2) Installing updates to all of your software through the Update Manager
3) Check and compose Email, Manage your to-do list and calendar and Send out meeting invitations with Evolution
6) Integration to chat and broadcast accounts with all your favorite social sites
7) Communicating with friends in chat and Facebook/Twitter with Empathy and Gwibber
8) Watch a DVD with Totem
9) Import music from CD, Copy music to and from an iPod, Listen to social radio, and browse the Ubuntu One Music Store from Rhythmbox
10) Import, Manage, Edit and Export photos with F-Spot
11 Open Word documents, Powerpoint presentations and Excel spreadsheets with OpenOffice.org and PDF's with Evine
12) Tabbed file browsing, two-pane browsing and connecting to network shared folders with Nautilus
13) Watch YouTube with Firefox and Totem
14) Manage your windows and organize your desktop with virtual desktops
15) Customize your themes and appearance
That is a lot of functionality there, right out of the box, without ever having to visit the terminal to enter a command. There is so much more that I didn't have time to include such as:
1) Creating slideshows and dvd's
2) Creating home movies and uploading them to YouTube or Facebook
3) Synchronizing your files, contacts, bookmarks, notes and music between your computers using Ubuntu One cloud storage
4) Connecting remotely to Windows, Mac or Linux computer with RDP or desktop sharing
5) Central account management and secure storage of keys and passwords
6) Advanced desktop management and desktop effects
7) Using Linux to clean or restore your broken or virus infected Windows OS
And this just barely scratches the surface of what is possible when you install additional software and customize your desktop. We will visit some of these features in more depth in following Debunkings and How-To's.
So what do you think? Is Linux a viable desktop alternative? Are tasks easy to accomplish without resorting to the terminal? Does the desktop environment look and act as you would expect a modern computer to? Are there other features you would like me to cover in the future? Use the comment button below to communicate with me.
1) From the infancy of the GUI in the mid-late '90s. But what was it pitted against? Windows 95 and Windows 98 in the Windows camp, and System 7 and System 8 on the Mac side of things (if you want to even consider a Mac side existed in that period before Microsoft bailed out Apple). The Linux GUI at the time consisted of windowing toolkits left over from Unix which was heavily console based. Gnome hadn't reached version 1 yet and KDE was not even a sparkle in someones eye. Would you still compare the latest OS X to Windows 95? Hell, I would even argue that the Windows 95 GUI was more functional then than the OS X of today! But that's may be a topic for another time. So why do people still compare the '70s Unix desktop to the Linux desktop of the 2010s? Because, either they haven't bothered to take a look at a recent release or have never bothered to look personally at any release and are just repeating the F.U.D they read online.
2) Because a lot of online documentation and tutorials reference how to do things via a terminal. There is nothing wrong with this, the terminal is easily accessed and very powerful. Often times it is much quicker to type a command (or copy and paste if you are following a guide), than it is to interact with a GUI. And it is definitely a lot easier to walk someone through a one line command than to try to explain to them every single mouse movement, button press and keystroke in a GUI and having to use outlined screenshots and videos to convey your information.
Ubuntu Linux 10.04 LTS (Lucid Lynx) was just released on April 29. It is a modern Linux distribution and features the latest Gnome Desktop for its user interface. They both follow a strict 6 month release cycle between releases and almost daily updates between releases. This ensures your computer is always up to date with the latest bug fixes, security enhancements and new features available. No more waiting 6 years between OS releases only to get a new theme and new hardware incompatibilities. This release adds two new themes (with a high resemblance to OS X), faster boot up and shutdown speeds, social networking integration, better desktop integration with Ubuntu One giving you 2GB of free cloud storage, a new Music Store and a lot more.
In the last Debunking Linux we looked at how fast and easy it is to install Ubuntu. Today we will look at what you get by default when you install it. The following video contains only software installed by default. The only setup done prior is installing video drivers, setting up email, chat and broadcast accounts and setting location. All of this is done easily using the menus on the top right of the screen. Also MP3 support was installed which you are prompted to install the first time you open Rhythmbox or access the Ubuntu One Music Store. Warning, the video moves very fast but it is the best I could do trying to cram so many features into the 10 minute constraints of YouTube.
Here is a list of what we just saw:
1) Installing software through the Ubuntu Software Center
2) Installing updates to all of your software through the Update Manager
3) Check and compose Email, Manage your to-do list and calendar and Send out meeting invitations with Evolution
6) Integration to chat and broadcast accounts with all your favorite social sites
7) Communicating with friends in chat and Facebook/Twitter with Empathy and Gwibber
8) Watch a DVD with Totem
9) Import music from CD, Copy music to and from an iPod, Listen to social radio, and browse the Ubuntu One Music Store from Rhythmbox
10) Import, Manage, Edit and Export photos with F-Spot
11 Open Word documents, Powerpoint presentations and Excel spreadsheets with OpenOffice.org and PDF's with Evine
12) Tabbed file browsing, two-pane browsing and connecting to network shared folders with Nautilus
13) Watch YouTube with Firefox and Totem
14) Manage your windows and organize your desktop with virtual desktops
15) Customize your themes and appearance
That is a lot of functionality there, right out of the box, without ever having to visit the terminal to enter a command. There is so much more that I didn't have time to include such as:
1) Creating slideshows and dvd's
2) Creating home movies and uploading them to YouTube or Facebook
3) Synchronizing your files, contacts, bookmarks, notes and music between your computers using Ubuntu One cloud storage
4) Connecting remotely to Windows, Mac or Linux computer with RDP or desktop sharing
5) Central account management and secure storage of keys and passwords
6) Advanced desktop management and desktop effects
7) Using Linux to clean or restore your broken or virus infected Windows OS
And this just barely scratches the surface of what is possible when you install additional software and customize your desktop. We will visit some of these features in more depth in following Debunkings and How-To's.
So what do you think? Is Linux a viable desktop alternative? Are tasks easy to accomplish without resorting to the terminal? Does the desktop environment look and act as you would expect a modern computer to? Are there other features you would like me to cover in the future? Use the comment button below to communicate with me.
Friday, April 23, 2010
After the Software Wars

After the Software Wars is a book by Keith Curtis about free software and its importance in the computing industry, specifically about its impact on Microsoft and the proprietary software development model.
The book discusses the importance of free and shared knowledge and the sense of community. It provides examples as well as challenges of free software and knowledge resources such as Linux and Wikipedia. It's available for free download in PDF and ePub from the authors site.
Subscribe to:
Posts (Atom)
